The timber clad self-build
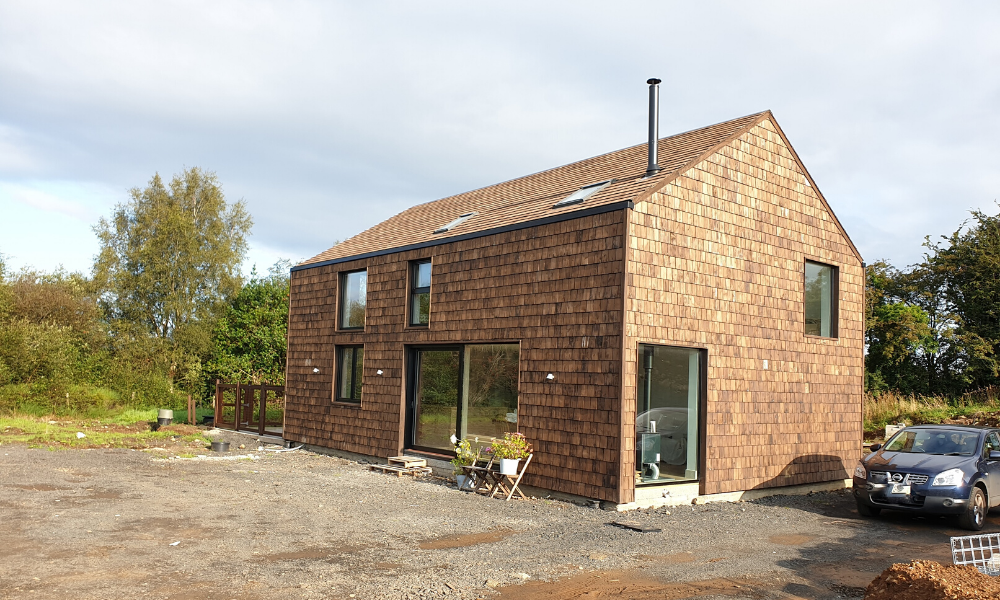
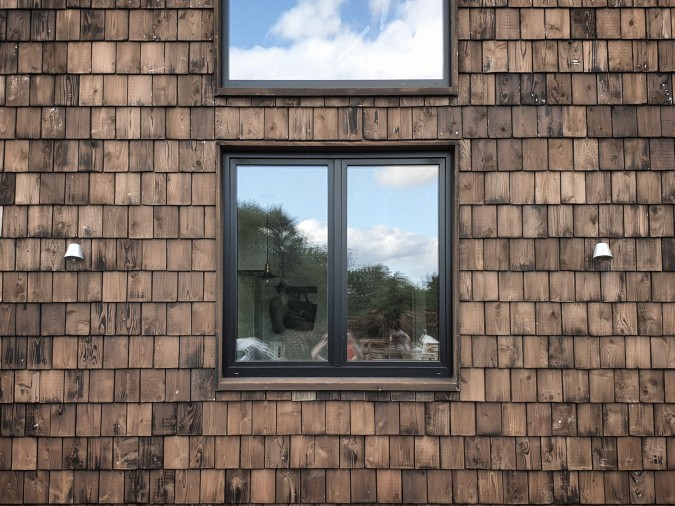
They say appearances can be deceptive. The ‘House in the Hollow’, as the Boyds have named it, looks like a simple barn structure. But upon closer inspection, the cedar-clad exterior reveals weeks of hard graft and a sharp eye for innovation.
Gareth Boyd, an architectural technician, together with his wife Lindsey and son Archie are reaching the end of their self-build journey and they’re delighted with their new “rustic, open plan space”.
“Our original plan was to create a four-bedroom home with open plan living and a timber cladding finish. Thankfully, the house hasn't changed too much from the original design,” reflects Gareth.
Their self-build adventure kicked off in October 2017 after the couple sold their house with the full intention of building their own home. It was a real surprise that their house was sold… just seven days after putting in on the market.
Gareth explains: “Our lack of savings meant that, like most people, we had to sell our home to fund the purchase of our plot so we had a clear out, decorated where necessary and put it on the market. But it all happened so quickly, which was fantastic in one sense, but it put real pressure on to find somewhere else to live and get a site sorted as soon as possible.”
They eventually found their dream plot at the end of 2017 and building commenced in July 2018.
A suitable plot came up – a large, remote site surrounded by mature trees with a lane leading to the edge of the site, with a water pipe installed and in reach of an electric pole.
Without further ado, Gareth checked that planning was still live on the site and whether they could change the design of the approved house without too many issues. Learn more about finding a building plot here.
He says: “Being in the industry, I am used to working on other people's dream homes which is fantastic, but we always wanted to do it for ourselves.”
After a little negotiation, the couple agreed on a price and began to carry out all the necessary legal checks with their solicitor.
Gareth speedily designed the home - saving on architect’s fees and time. The couple were able to pull together designs in a few days with minor tweaks between initial sketches and planning.
Gareth added: “We based the design on a simple barn shape to minimise build cost and we got everything we needed fitted into 1,700 sq feet - again to keep costs to a minimum.
“We approached a mortgage advisor to ensure that there were no issues with the site that would put off the lenders. The lender provisionally checked over both the site and proposed design, confirming that there were no obvious problems. Learn more about self-build mortgages here.
“Unfortunately you cannot submit the full mortgage application until you receive planning approval, but at least it gave us a little piece of mind. Next stop was to check the condition of the groundworks. A few test holes were dug out to ensure no adverse conditions would lead to excessively expensive foundations being required.”
All the legal checks and necessary approvals were granted but a call from their planning officer delivered some disappointing news.
“The planning officer explained that they were generally happy with our overall design of the house. But the shuttered concrete chimney we included in our designs was rejected,” recalls Gareth.
“We could have fought the decision and possibly managed approval on the original design, but it would have caused significant delays and there was no guarantee of success. We decided to discard the idea of the chimney and try to get the approval through sooner rather than later.

“It wasn’t long before we heard back that planning was happy with the changes. The complete process from submission to approval took less than two months, which was very quick for an application in our area.”
Existing approval on the site also helped to push the Boyd’s application along. Planning on a greenfield site (a site which has never been built on before) could have caused further delays.
Next, the couple pushed ahead in completing the full application for their mortgage.
Gareth says: “Generally, lenders will only lend a maximum of 75 per cent of the final value of the house, so all the plans were sent through to be valued and a site visit arranged, so the final loan amount could be calculated.”
Building a budget
“We spoke to a mortgage broker who advised on our borrowing limits which we were able to use as a basis for our budget.
“The budget creeped up slightly over the course of the build. The installation of the cedar roof shingles and some of the groundworks ended up being more expensive, so we had to cut back on other areas to compensate.
“We also had to build the garage due to mortgage structure. We were not aware at the time, but when the bank valued the house for the mortgage they based the overall value on both a house and detached garage. We thought that the amount we were borrowing was just to build the house but we discovered, near the end of the build, that the money was also to cover building the very large garage. Due to this, the bank was not prepared to release the final amount of the mortgage until both are finished, so we’re having to try and come up with the money to build a garage we hadn’t planned on building for a couple of years. This pushed our budget over and meant there were other things (like landscaping) which will have to wait for a while.
“We roughly based our budget allocations on the staged mortgage payments from the bank, but as the mortgage stages aren't based on money spent (just five equal payments) it didn't quite work out that way. It meant that some stages of the build we had spare money to carry over, but some of them were very tight and required some third party borrowing as well.”
Learn more about taking out a self-build mortgage in our blog.
The devil’s in the detail
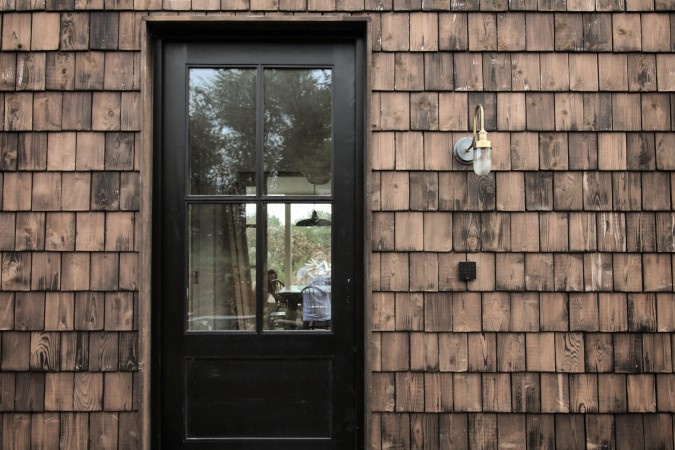
One of the biggest challenges on the Boyd’s self-build project was burning, brushing and sealing 10,000 cedar shingles to envelop their self-build structure. This mammoth task took them 12 weeks of hard labour and did cause delays to the rest of the project.
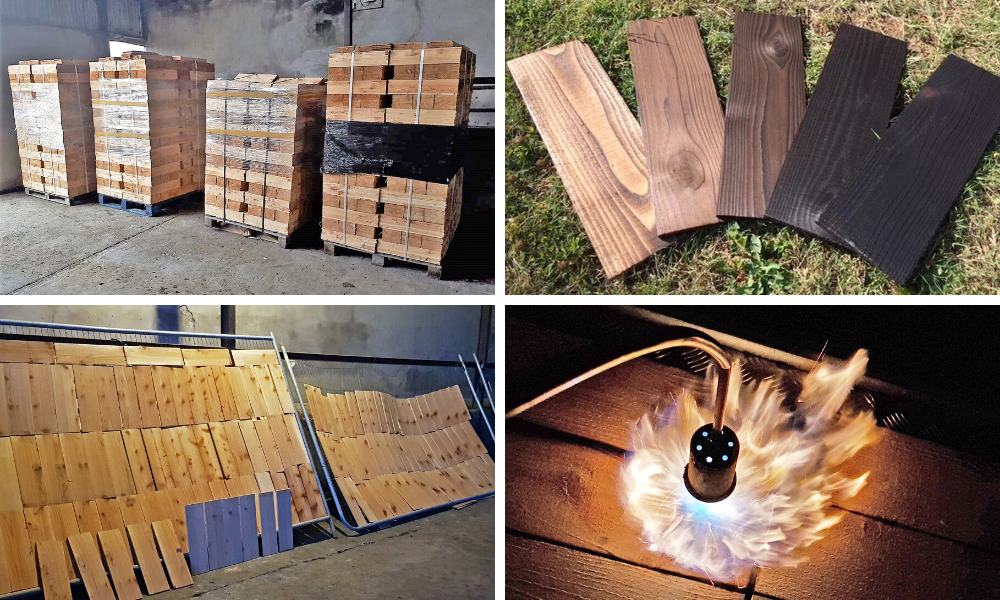
The couple considered using corrugated metal sheets and fibre cement slates, but as the design of the house is very simple, they opted for a material which would add both texture and warmth – a move away from traditional Irish materials. Timber ticked both those boxes.
Gareth explains: “There have been a few low points in the build, mainly due to the fact that we were project managing and carrying out some of the work ourselves, so there were a lot of long days and late nights. The burning of the shingles was probably the hardest part.”
Gareth found a local supplier, JP Corry, who had access to a saw mill that could produce them.
Gareth adds: “Cedar will last a long time, even if left untreated and can look beautiful once it has silvered down, but this process can take a number of years and typically different parts of the building will weather at different rates.
“We really like the aesthetics of untreated cedar but the uneven weathering made us look at alternative ways to get what we wanted right from the start and for years to come, without constant maintenance. The charred shingles will slowly fade and lighten over time, but at a much more gradual and controlled rate, which we don’t mind at all. Even though the main reason was aesthetics, the fact that burning the shingles will significantly extend their lifetime is definitely a bonus."
Gareth worked closely with a company called Toasted, whom he had worked with on a couple of projects in his day job. They helped him to experiment with the different colours and finishes that could be achieved – gaining some lessons and tips on the look he wanted.
“As timber is a natural material, each shingle varied in the amount of time it took to burn,” explains Gareth.
“They all seemed to burn at a slightly different rate, depending on the grain and other factors. They ended up with different levels of charring, which then required a varying amount of brushing.
“Thankfully we have had a lot of help from family and friends. With the amount of time and money spent on preparing the shingles, I wanted to make sure that they were installed with the same care and attention, so I brought a team of skilled joiners on board.”
The couple opted for black powder-coated aluminium gutters, which are recessed into the wall and flush with the shingles. Hidden gutters would have taken more work and eaten into their budget.
The end in sight
The couple still have interiors to finish and landscaping to complete but their self-build journey is almost drawing to a close.
“We feel relieved! It's not quite finished, but now that we're moved in, it's starting to feel like all the hard work might just have been worth it,” says Gareth.
A rustic timber frame house, fully clad in charred shingles with open plan living. That’s what Gareth and Lindsey had in mind when they embarked on their self-build adventure.
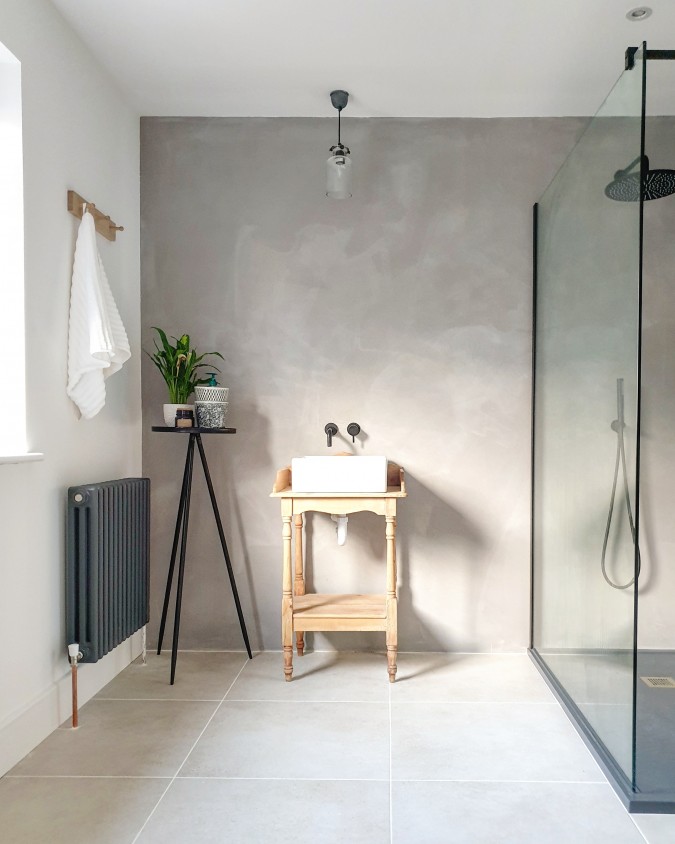
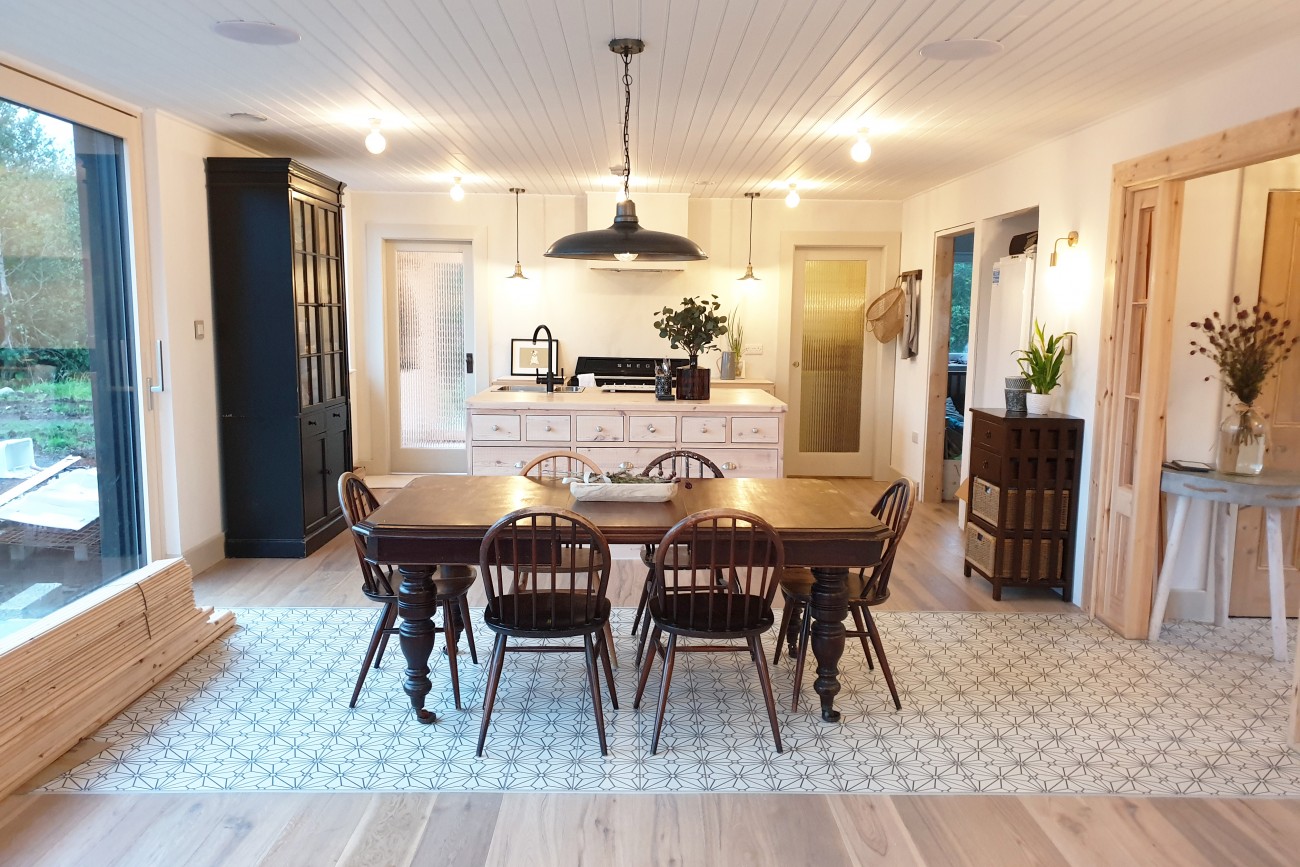
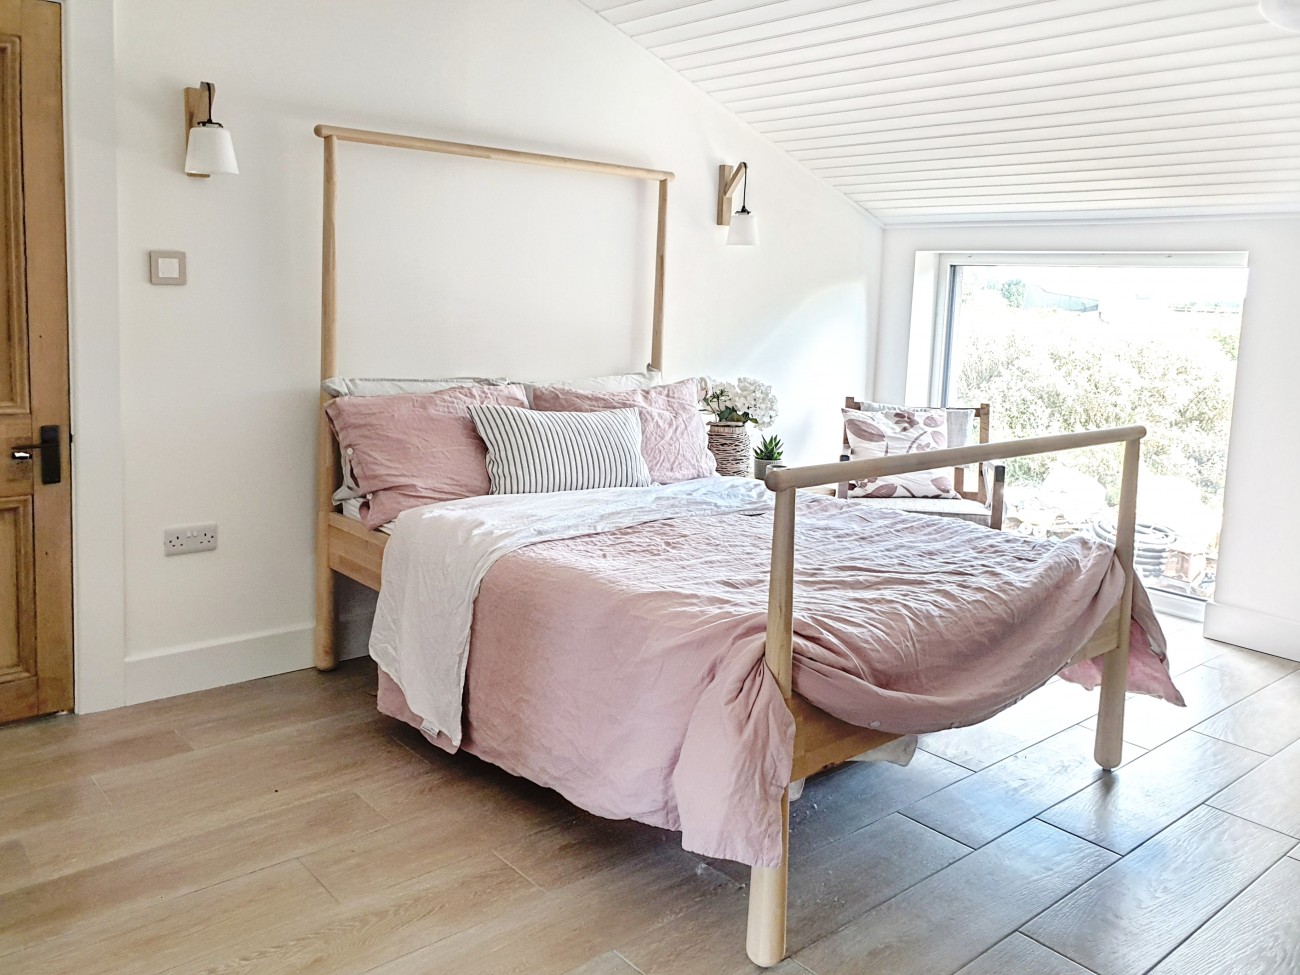
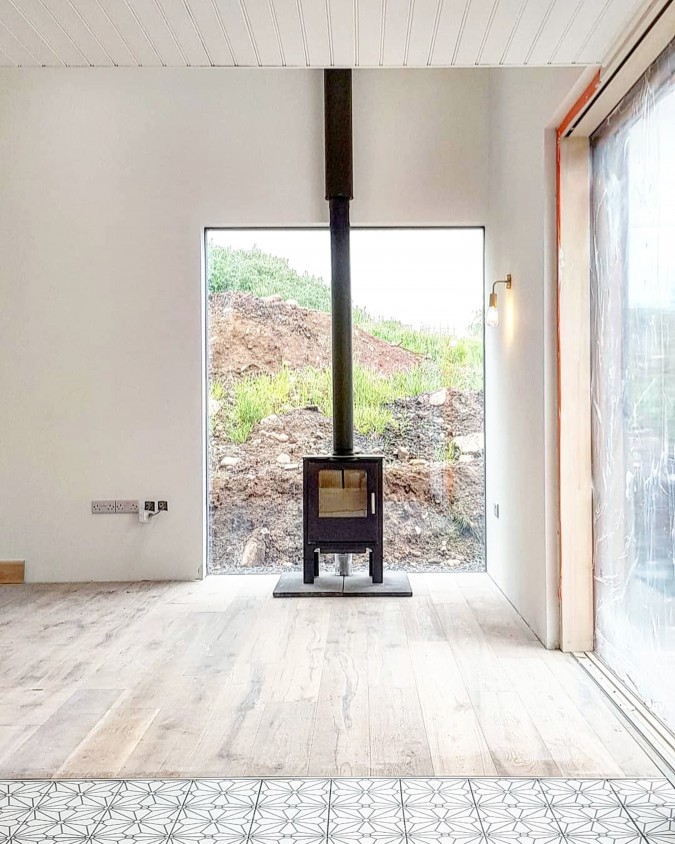
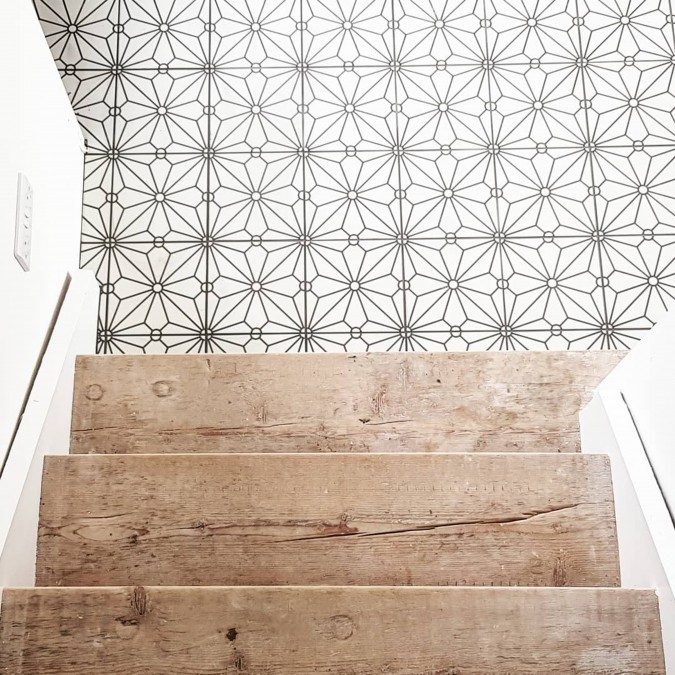
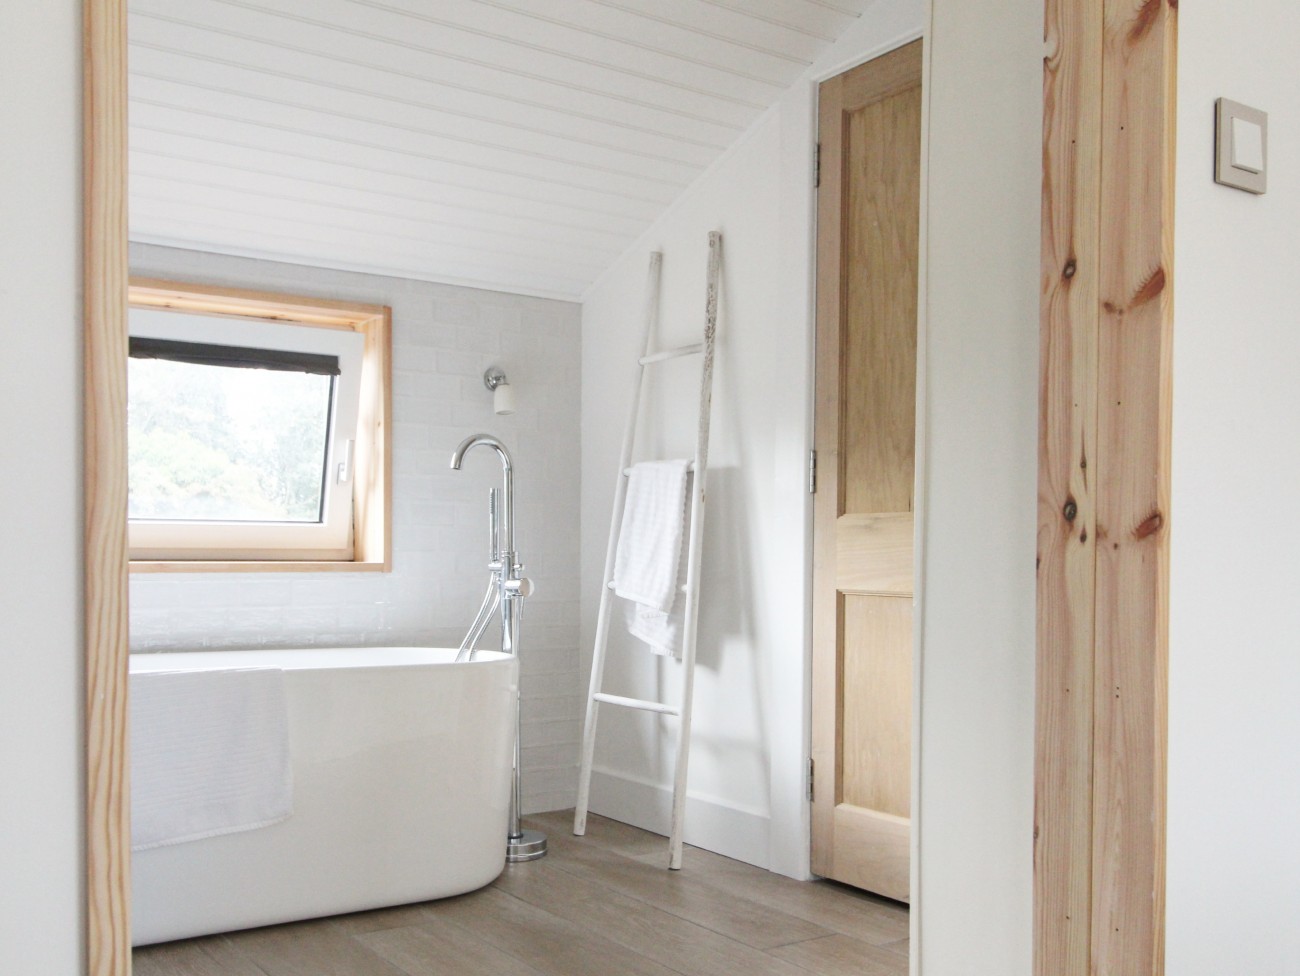
The end result is a charming, rustic home full of Scandinavian design statements. Their self-build is filled with natural and subtle materials from the timber floor which runs through the kitchen to the wood burning stove in front of the frameless window, which floods the room with daylight.
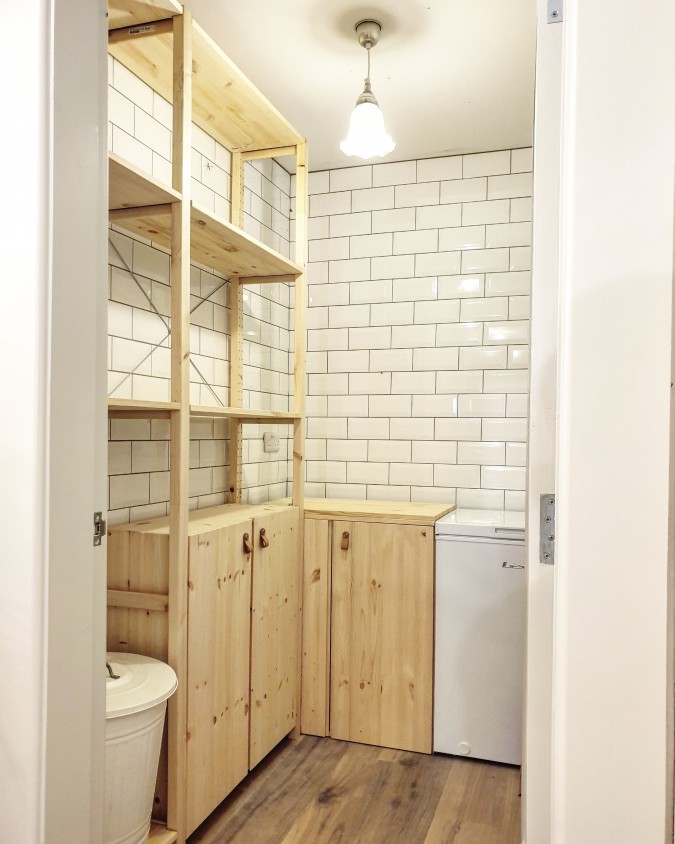
The kitchen is “basic”, describes Gareth, with its large pine island and two low level cupboards and free standing timber shelves in the larder just off the kitchen. The couple combined natural flooring with tiled areas to define areas, like the dining room.
Outside, the contemporary roof is a talking point. It blends beautifully into the natural setting filled with mature trees and hedges – a cosy cabin in the countryside.
Inside, an innovative Smart Home system by Loxone automatically controls the lighting and heating in the house, as well as integrating multi-room speakers, security and access controls. The family installed an MVHR (Mechanical Ventilation with Heat Recovery) which provides fresh filtered air into a building while retaining most of the energy that has already been used in heating the building.
The family moved back home in July 2019 after staying in Gareth’s parent’s home during the build.
He says: “We had originally thought that we could have built our home in around nine to ten months, but looking back at it, it was pretty unrealistic considering we were project managing the build in our spare time.
“One of the highlights was when the scaffolding came down after the shingles had been fitted. Also, when the flooring went down in the open plan area was when it first started to look like a house instead of just a building site.
“I’d definitely take my time a bit more if I could do this again. We rushed a few decisions to keep things moving and made a few mistakes along the way but it’s part of the process. I would highly recommend building your own home, but actually managing the process yourself definitely isn't for everyone. It is incredibly time consuming and stressful and unless you have flexible working hours, or have someone who can help out during the day, it would be a mammoth task. Bringing in a contractor to look after it for you would definitely be a lot easier, but it does work out more expensive. Whichever route you go down, it's a great feeling when you're walking around a house you've designed to suit how you and your family live.
“I never realised just the amount of time, effort and organisation required when project managing a build. If I'd have known beforehand, I'd have been a bit more prepared and would have put things in place to keep things running a little more smoothly.”
Gareth's top tips for self-builders
Do your homework
There will be a number of professionals to guide you along your self-build journey, but it’s always good to do a bit of research. It’s important to work out if self-building is the right choice for you financially, but it’s also beneficial to have some background knowledge to help you understand the process.
Design for life
Everyone wants to get on site as soon as possible, but an extra few weeks fine tuning your design plans can end up saving time and money on site.
Storage, storage, storage
It’s easy to get carried away with pretty pictures of kitchens on Pinterest, but it’s just as important to plan where you’re going to store your vacuum.
Who’s your gofer?
Don’t even consider project managing your own build unless you (or someone you know) can drop everything at a moment’s notice and go for whatever your subcontractors have run out of. If you can’t, you’ll end up paying for subcontractors to stand about all day, waiting for screws, adhesive, cable etc. to arrive.
Make your decisions early
Try and choose your fixtures and fittings as soon as possible. It’s not always easy to pick lights for a room that’s not even plastered, but before you know it, there will be someone standing on site waiting for it…and it’ll still be in the post!
Use an estimating service
I’d definitely recommend using an estimating service like Build Aviator. It gave me an idea of the materials I needed and the amounts required. When it came to ordering the cedar shingles I knew how much was required and it also meant I could order them in advance to work on them before I’d even started on site. Using this service also helped me to source my materials at a third of the cost I had originally planned. With the SAP estimation service, I worked out insulation requirements in order to pass building control. I was able to use that, along with the estimation services, to make sure I could source the insulation I needed. Turning a specification on a drawing into real life figures helps to show what your energy costs will be throughout the year. I found the Build Aviator services very helpful when it came to budgeting for my project – it allowed me to gain a breakdown of costs for each stage of my self-build. I’d advise any self-builder to start estimating sooner rather than later.
7 things your architect needs to know to start on your design
Gareth Boyd is a Director at 2020 architects so we've spoken to him about when they need to know before they can make a start on your design.

The oak framed home with timber cladding
Read Lucy and Sam's case study to hear all about their self-build journey